How to create a realm in Minecraft
How to Create a Minecraft Realm: The Complete 2026 Guide
Setting up your own private world in Minecraft has never been easier. Whether you want a small survival retreat for two friends or a massive 10-player creative hub, Minecraft Realms is the official, “no-headache” way to host a server.
In this guide, we’ll walk you through the costs, the setup process, and how to manage your new digital kingdom.
What is a Minecraft Realm?
A Minecraft Realm is a subscription-based server hosted directly by Mojang. Unlike traditional server hosting, you don’t need to worry about IP addresses, port forwarding, or keeping your own computer running 24/7. Your Realm is always online, allowing your friends to hop in and build even when you’re offline.
For those looking to optimize their general gaming setup before diving in, checking out Elite Gamer Insights can provide great tips on performance hardware.
1. Choosing Your Plan: Pricing and Tiers (2026)
Minecraft offers different plans depending on which version of the game you play (Bedrock or Java).
Bedrock Edition (Consoles, Mobile, Windows)
Bedrock players have two main options. If you’re playing on a budget, the basic “Realms” tier is great for small groups. If you want the full experience, “Realms Plus” is the way to go.
| Feature | Realms (Small) | Realms Plus |
|---|---|---|
| Monthly Cost | $3.99 USD | $7.99 USD |
| Simultaneous Players | You + 2 Friends | You + 10 Friends |
| Marketplace Pass | No | Yes (150+ Monthly Items) |
| World Slots | 3 | 3 |
| Cross-Play | All Bedrock Devices | All Bedrock Devices |
Java Edition (PC, Mac, Linux)
Java Edition keeps it simple with a single subscription tier. It costs $7.99 USD per month and supports you plus 10 friends. Java Realms also includes access to a rotating selection of community-made adventure maps and minigames.
2. How to Create a Realm: Step-by-Step
The process varies slightly depending on your platform, but the core steps remain the same.
For Bedrock Edition (Xbox, PS5, Switch, Mobile, PC)
- Open Minecraft and sign in to your Microsoft Account.
- Click Play from the main menu.
- Navigate to the Worlds tab and select Create New.
- Choose Create New World.
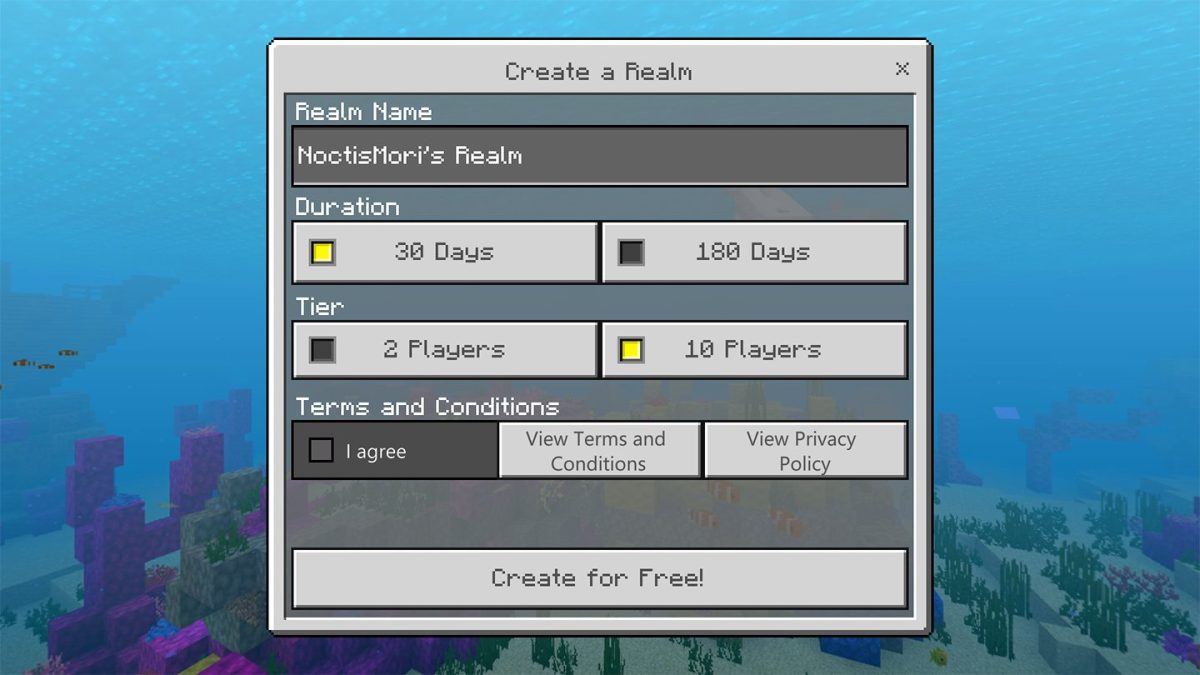
- On the left-side menu, look for the Create on Realms button.
- Select the tier you want (10-player or 2-player).
- Agree to the Terms and Conditions and complete the purchase through your platform’s store.
For Java Edition
- Launch Minecraft: Java Edition from the Minecraft Launcher.
- On the main menu, click the Minecraft Realms button.
- If you don’t have a Realm, click Buy Realm (this will open your browser to the official Minecraft site).
- Log in with your Microsoft account and complete the subscription setup.
- Back in the game, your new Realm will appear. Click on it and select Configure to give it a name and description.
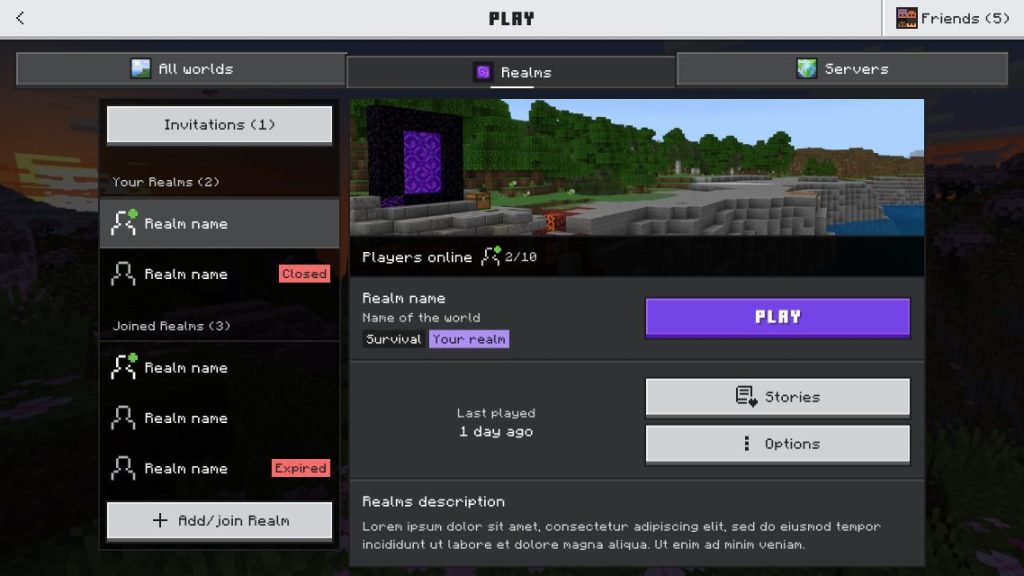
3. Inviting Friends to Your Realm
Once your world is live, it’s time to populate it. Remember, only the owner pays for the subscription—your friends play for free!
Inviting on Bedrock
- Go to Play > Worlds.
- Click the Edit (pencil) icon next to your Realm.
- Select Members.
- You can invite friends from your Microsoft friends list or click Share Link to get a join code.
Inviting on Java
- Click Minecraft Realms from the main menu.
- Select your Realm and click Configure.
- Select Players.
- Click Invite Player and type in their Minecraft username.
4. Managing and Configuring Your World
As the “Realm Master,” you have several tools to keep the game fun and safe.
World Slots
Both Java and Bedrock give you three world slots. This means you can have a Survival world in slot 1, a Creative world in slot 2, and a Minigame in slot 3. Only one slot can be “active” at a time, but you can switch between them instantly without losing progress.
Backups
Realms automatically backs up your world periodically. If someone accidentally burns down your mega-base with a stray lava bucket, you can go into the Backups menu and “Restore” the world to a previous state.
Marketplace Pass (Realms Plus Only)
If you have Realms Plus on Bedrock, you get access to a massive library of skins, texture packs, and worlds. You can apply these to your Realm so that everyone playing experiences the same high-quality textures. If you’re looking for more ways to enhance your gameplay, Elite Gamer Insights often covers the latest in gaming trends and software updates.
5. Is a Realm Right for You?
While Realms are incredibly convenient, they aren’t for everyone.
Pros:
- Zero Technical Skill Required: No server files to manage.
- Safe for Kids: Only invited players can join.
- 24/7 Access: The server is always on.
Cons:
- No Heavy Modding: You cannot install massive Java modpacks (like RLcraft).
- Player Limits: Capped at 11 players total.
- Monthly Cost: It is a recurring subscription.
For those who want to build a massive community with 50+ players or complex plugins, a dedicated third-party server might be better. But for a group of close friends or family, a Realm is the gold standard for ease of use.
Summary Checklist for New Owners
- [ ] Ensure you have a stable Microsoft Account.
- [ ] Choose the right tier (2-player vs 10-player).
- [ ] Set “Show Coordinates” to ON in settings (highly recommended!).
- [ ] Set up a recurring payment or use a gift card.
- [ ] Invite your first three friends and start building!
Creating a Realm is the first step in a long journey of blocks and creepers. Whether you’re building a 1:1 scale of your hometown or just trying to survive the first night, having a dedicated home for your group makes the experience much more meaningful.
