Content
Published: 6th December 7:34PM
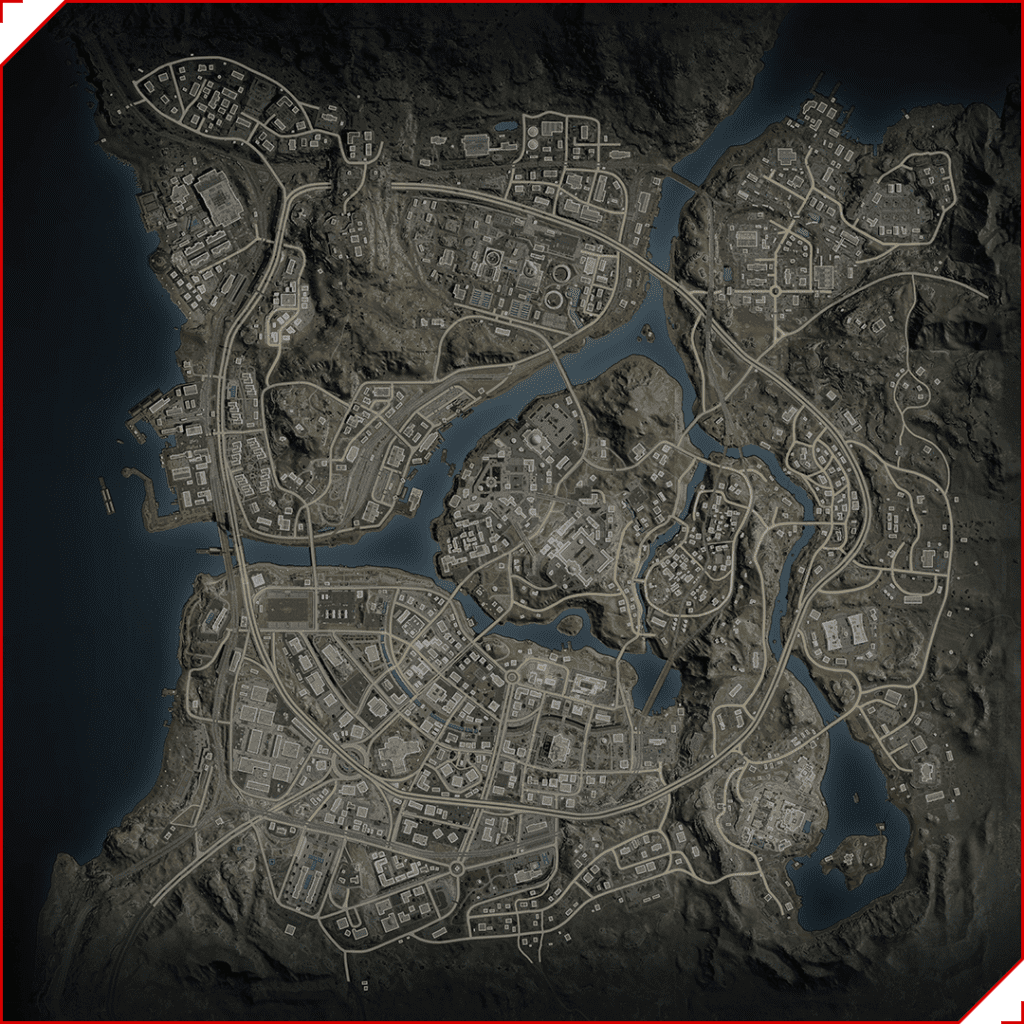
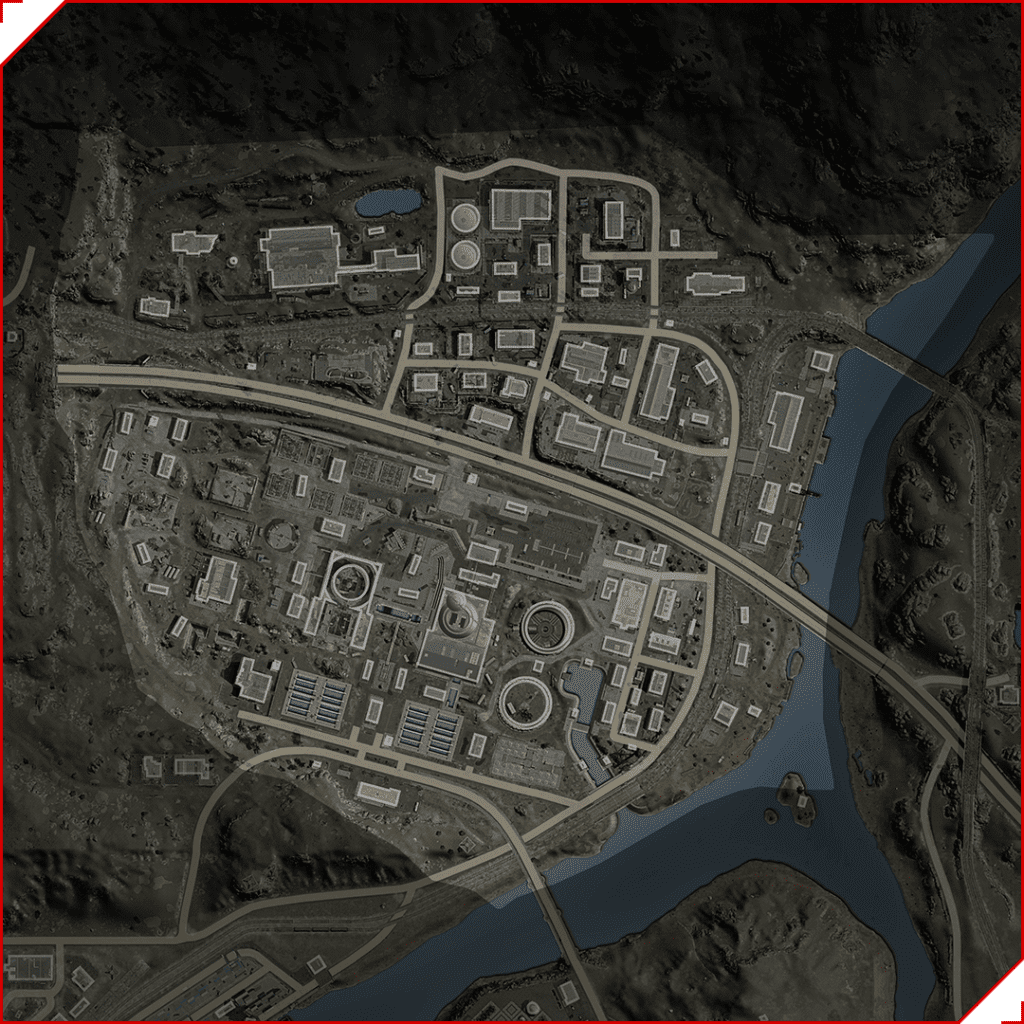
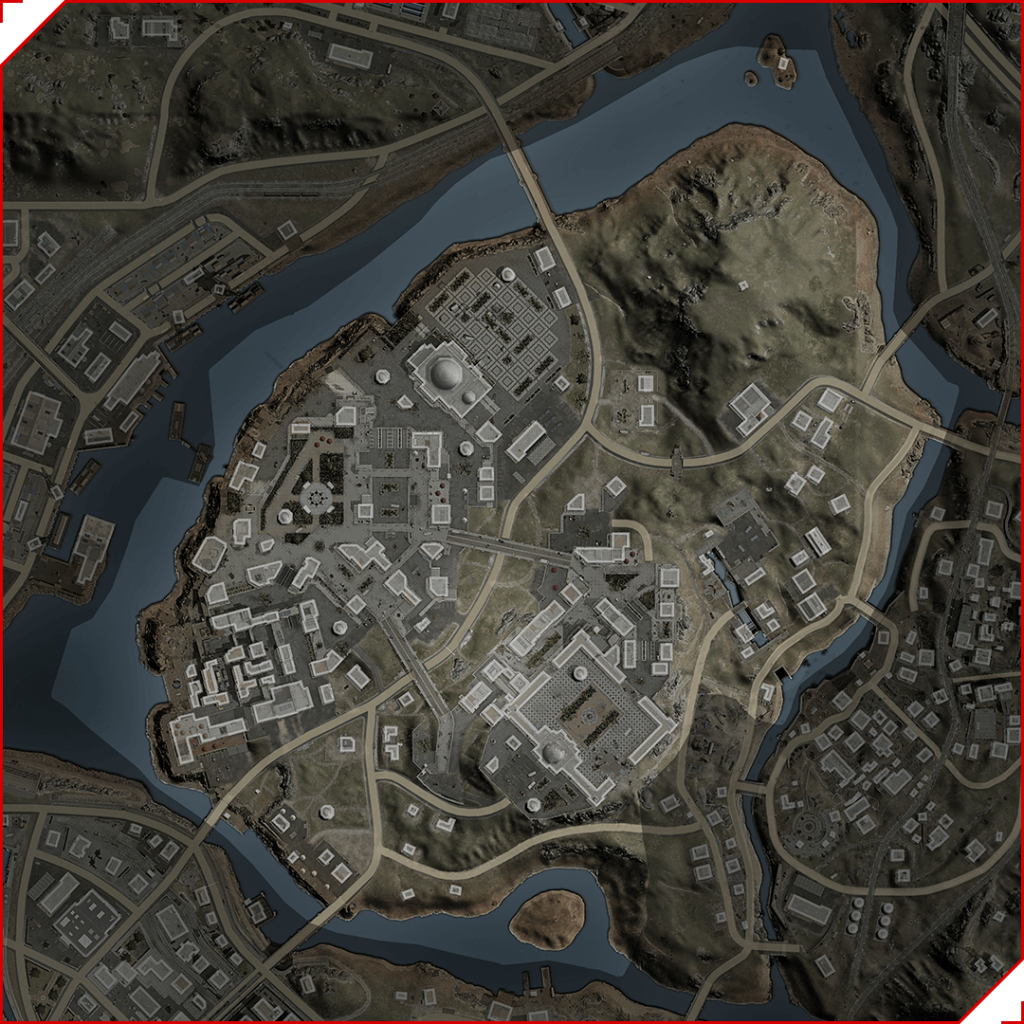
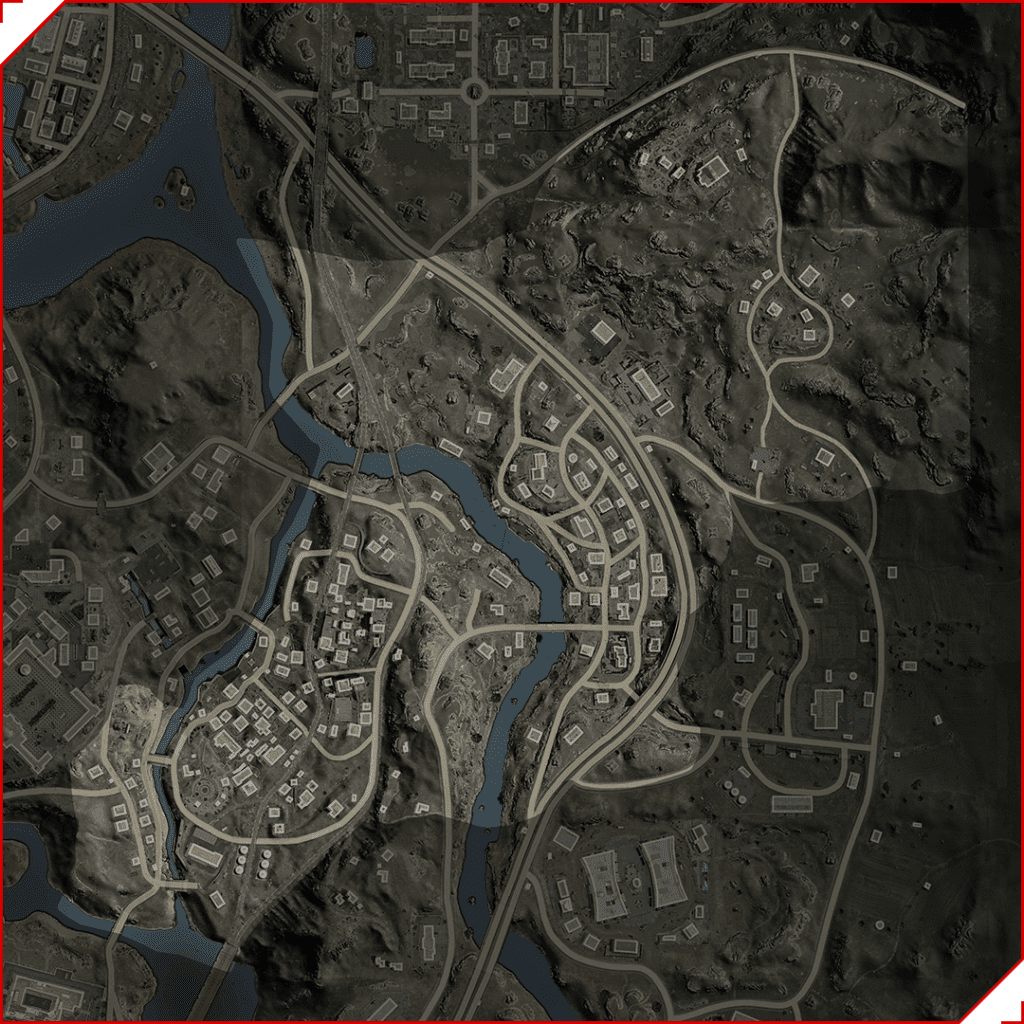
Warzone Season 1 is here, and here is where to land in Warzone Urzikstan! Strap in and learn about each of the POIs in Urzikstan, where best suits you and where to avoid. We’ll go over all of the best places, so you know where to land in Warzone Urzikstan.
Levin Resort
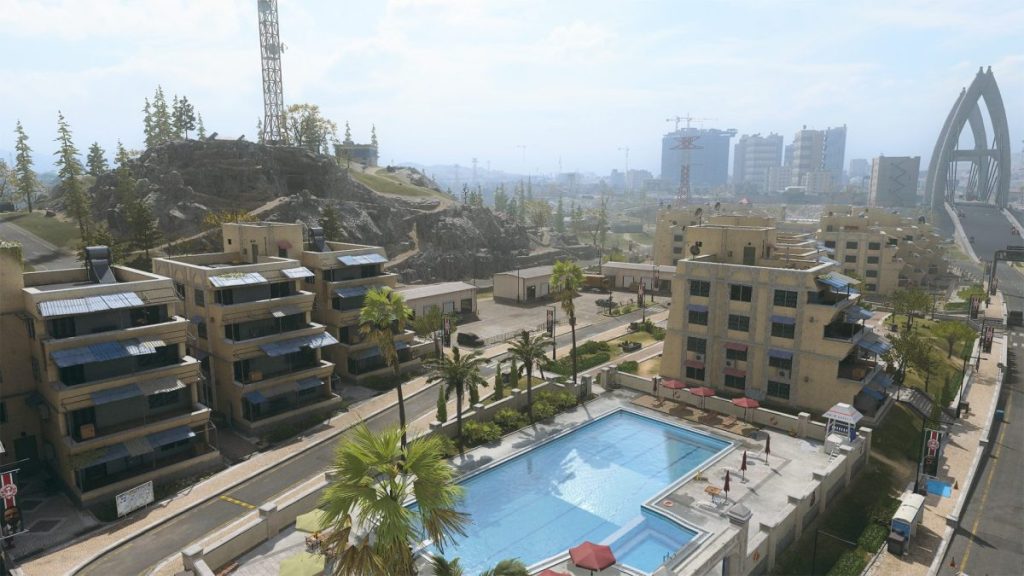
The once bustling Levin Resort is now an abandoned complex with poolside shops, business centers, and a large central courtyard. Tread cautiously through the courtyard and defaced statues of General Barkov, using building corners for cover. Vantage points in the hotel overlook the area, allowing teams to pin down enemies below while looting for cash and gear. Drop here for close-quarters combat with a mix of open and enclosed spaces.
Kotovo Blocks
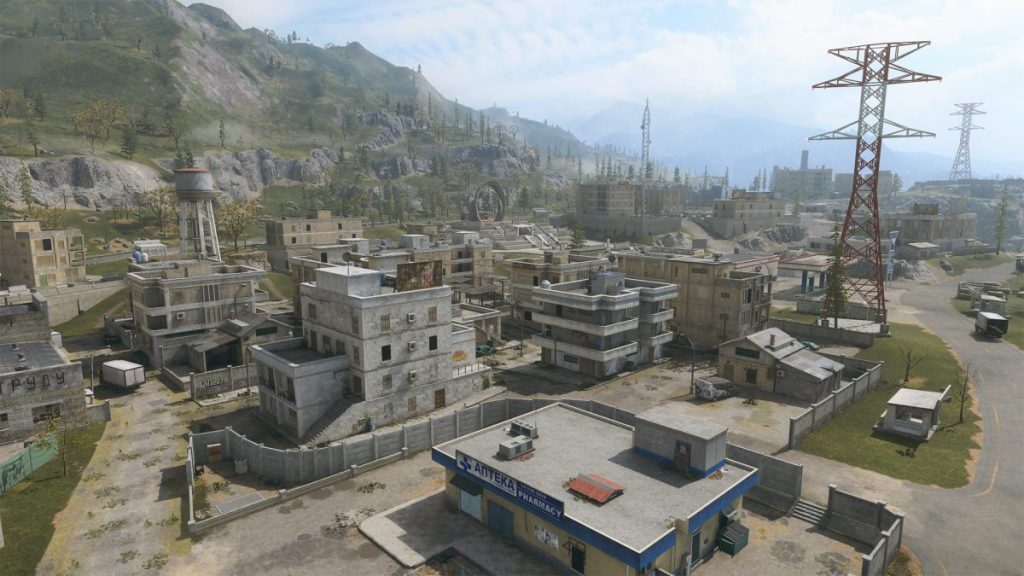
Kotovo Blocks comprises low-rise apartments, shops, and a monument with hanging bells in the central square. Flanked by mountains and train tracks, the area features tunnels east toward industrial zones and grassy foothills for flanking. The dense urban buildings encourage close-range fights with some verticality. Use the apartments and shops for scavenging loot, but watch for enemies shooting down from the monument or surprise attacks from the tunnels.
Rostova Shops
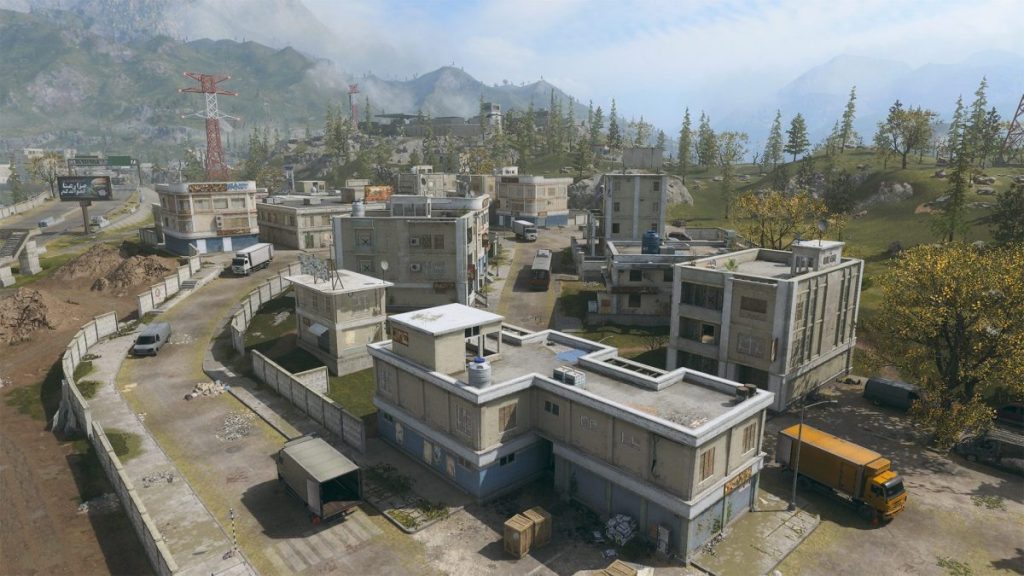
A small neighborhood of a dozen shops and mixed-use buildings near the Levin Resort train station. The close proximity creates tense indoor combat across multi-level structures connected by staircases and corridors. Loot cash and gear quickly, but remain vigilant of sharpshooters aiming down the open sight lines east toward Talanov Outpost. Use interior spaces for cover during firefights before repositioning to the next building.
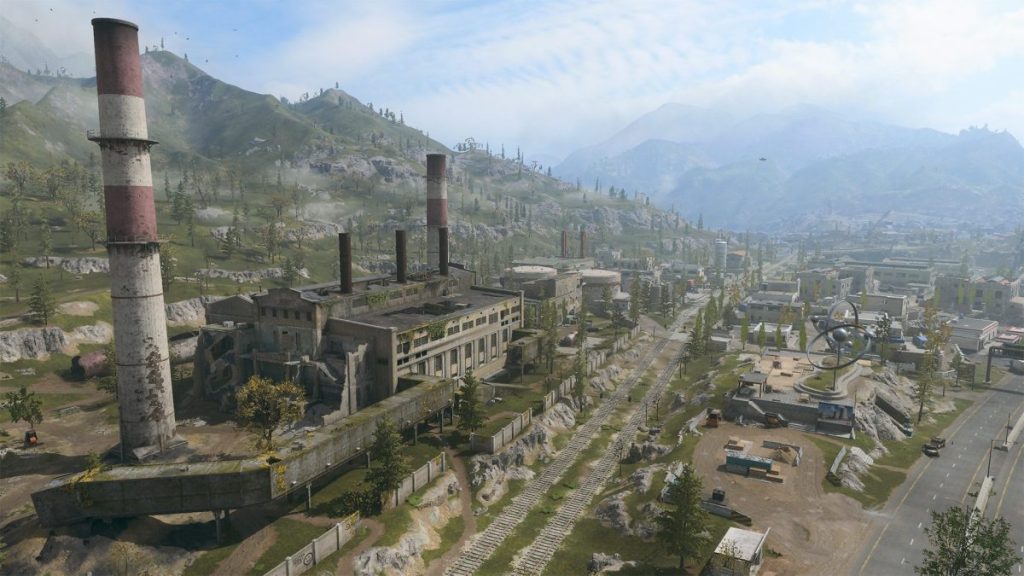
Popov Power
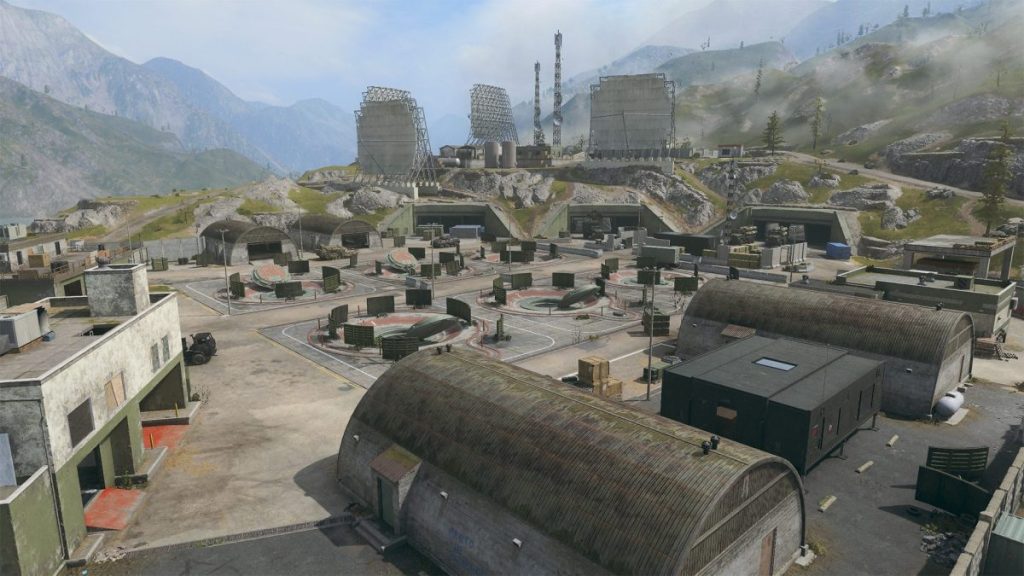
This large power plant supplies Urzikstan’s energy needs. Battle amid cooling towers, pipelines, and industrial machinery while flanking opponents through offices and locker rooms. Trucks and freight containers scattered throughout provide cover when securing the area. Watch for ambushes; the long roads allow enemies to see approaches. Use the various one-story buildings on site to circle around attackers. Scavenge Loadout Drops and high-level weapons to gain an advantage.
Sorokin Industrial
Sorokin Industrial features sprawling factories and warehouses with vast interiors for mid-range engagements using ARs and LMGs. The multiple floors enable vertical flanking maneuvers and catwalks provide overwatch against targets below. Keep moving between buildings via exterior roads to avoid being pinned down. Use the Ascender to reach the upper gantry of the western factory. Then take the nearby zipline into the office for operations planning or sniping.
Drezna Sub Base
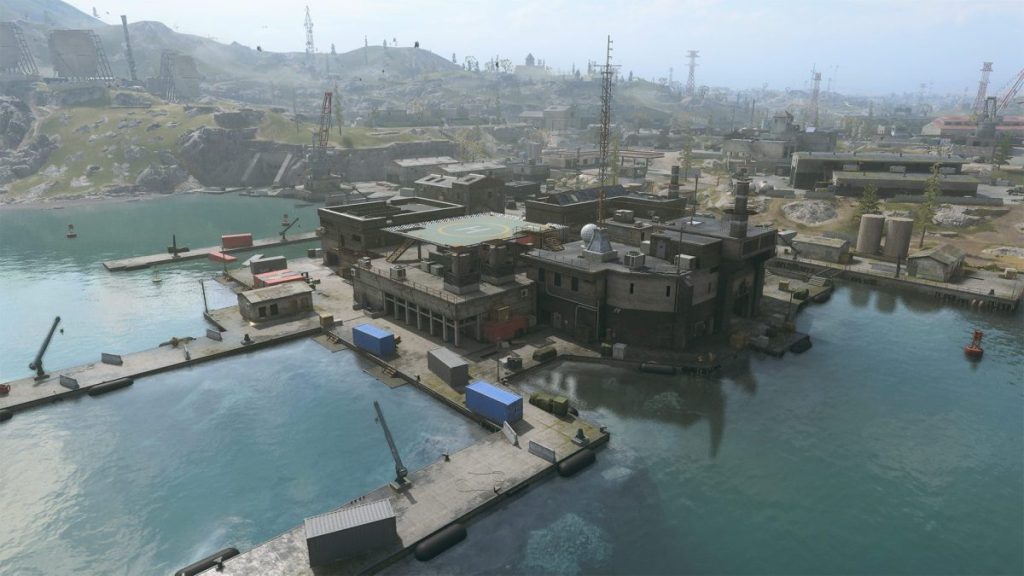
This large sub base has a helipad, water access, ziplines, and huge storage facilities. The expansive grounds enable diverse combat approaches; you can bunker down between shipping crates for close-quarters fights or utilize the roof for long-range sniping. Interior stairways facilitate vertical movement through structures. Launch aquatic infiltrations from boats along the river. With interconnect buildings and multi-level terrain, expect action from all sides.
Zlatyev Array
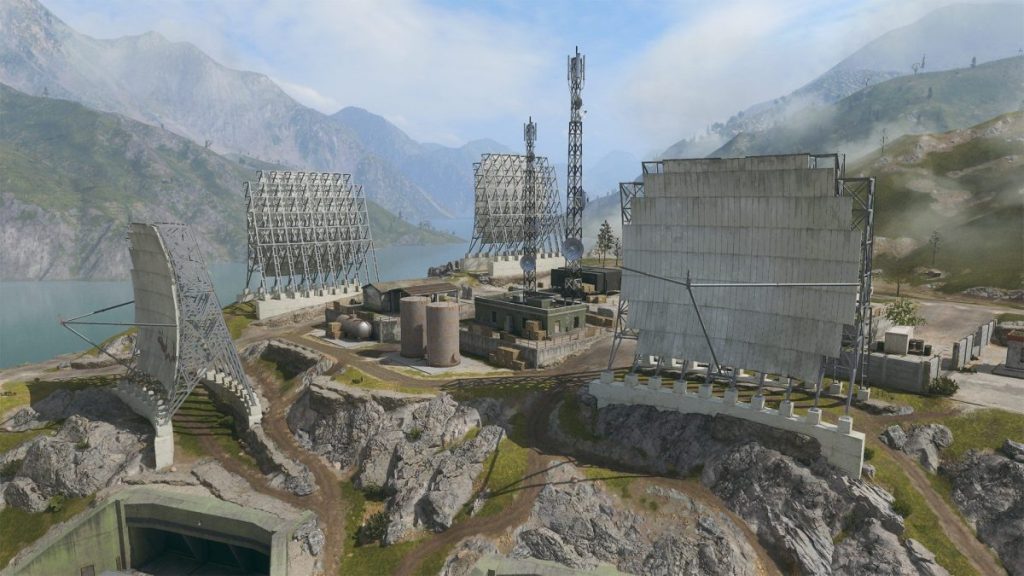
Positioned on high terrain overlooking the Orlov Military Base, Zlatyev Array favors long-range snipers. The elevated hills provide exceptional sight lines across south Urzikstan’s buildings, roads, and landscapes. A collection of small shacks and radio towers dot the area, offering cover while observers scan for targets and call out enemy locations to the squad. Beware getting flanked though—use Proximity Mines to watch your six. Be prepared to quickly switch from sniper rifle to SMG when opponents inevitably infiltrate your position. Use elevation changes and rocky outcroppings to re-angle.
Kadurin Silo
This agricultural complex contains large storage silos, processing buildings, and containment bunkers. Use heavy machinery and concrete barriers for cover when navigating between structures or hide within rooms to ambush passing enemies looting for gear. Watch for counter-snipers from the high ground around Zlatyev Array to the northwest. The long rows of silos funnel teams into close-range duels—an assault rifle or LMG excels here. Flank wide along the road to outposition campers. With limited observation, remain vigilant for attackers from all sides when holding the central strongpoint.
Seaport District
Urazikstan’s main docks feature anchored fishing vessels, processing centers, and transportation infrastructure. Use the shipping containers, ATVs, and equipment as cover during firefights. Eliminate threats from second-story windows overlooking the port. Dive into the water to silently infiltrate then ascend watchtower ladders to catch opponents off-guard. The wide roads allow long sightlines between cranes and warehouses so have a sniper watch flanks. Teams might gather here early, quickly escalating a loot race into a brutal skirmish. Escape via boat or truck when the situation gets dire.
Al-Abboud Condos
These six multi-story condo blocks feature central courtyards and stepped/tiered architecture. Each building has balconies and roof access allowing teams to scout and snipe outward in all directions. Expect close-range skirmishes room-to-room as squads clear individual floors searching for loot and equipment. Watch for enemies cutting through side alleys or ambushing from the nearby Burger Town. Use the exterior pedestrian bridge to third-party remaining squads once the initial hot drop fight concludes. There’s quality cover placing Claymores on the main road bridge to counter pursuing vehicles.
Urzikstan Cargo
This large shipping hub contains stacking cargo containers forming a metal maze prime for close-quarters combat. The high overhead cranes provide excellent overwatch to call out opponent locations below while also allowing teams to rapidly reposition to better vantage points among the boxes. Navigate the exterior catwalks to outflank enemies secured on ground level. Be attentive inside though; the tight spaces limit awareness so you can get ambushed easily. The initial frenzy lends well to shotgun and SMG skirmishes during early game, while late-circle finishes reward accurate assault rifle fire down long corridors.
Talanov Outpost
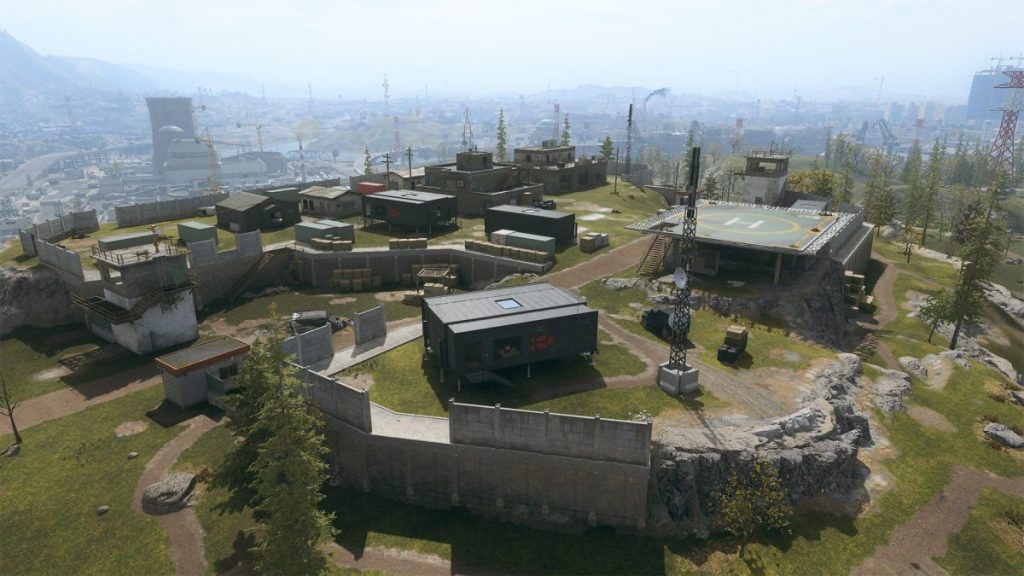
Perched on a ridge providing excellent visibility over the land below, this abandoned Russian complex has become a key Konni Group stronghold. Small shacks, guard towers, and barracks facilities litter the area, culminating to a large central command structure. Use the high terrain to your advantage when pushing teams below or climb towers with snipers covering fire lanes. There’s risky reward rappelling in to loot before escaping off sheer cliffs. Approaching vehicles announce themselves on the winding road, allowing rock solid ambushes, though beware getting pinned along the cliff edges with no cover.
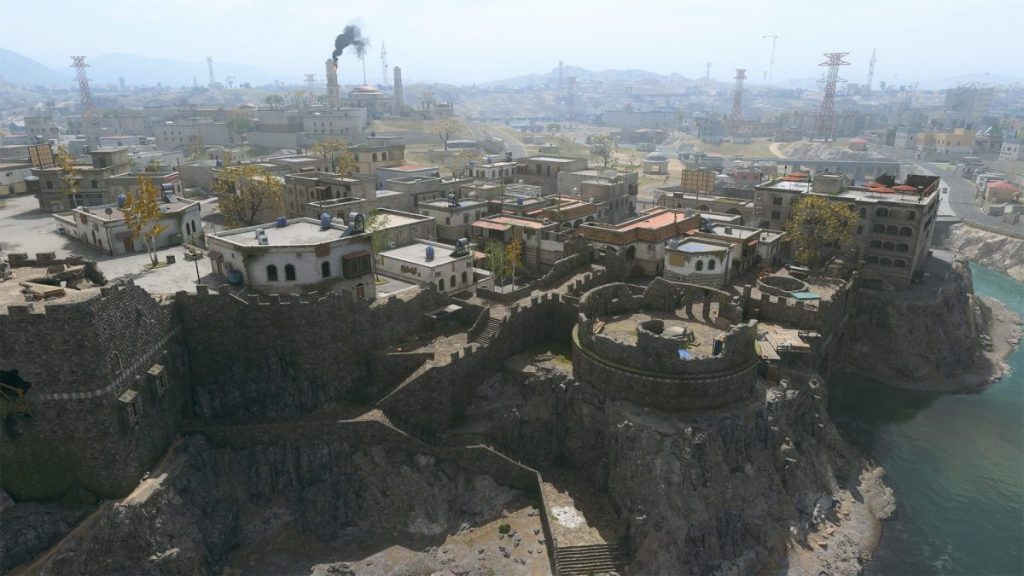
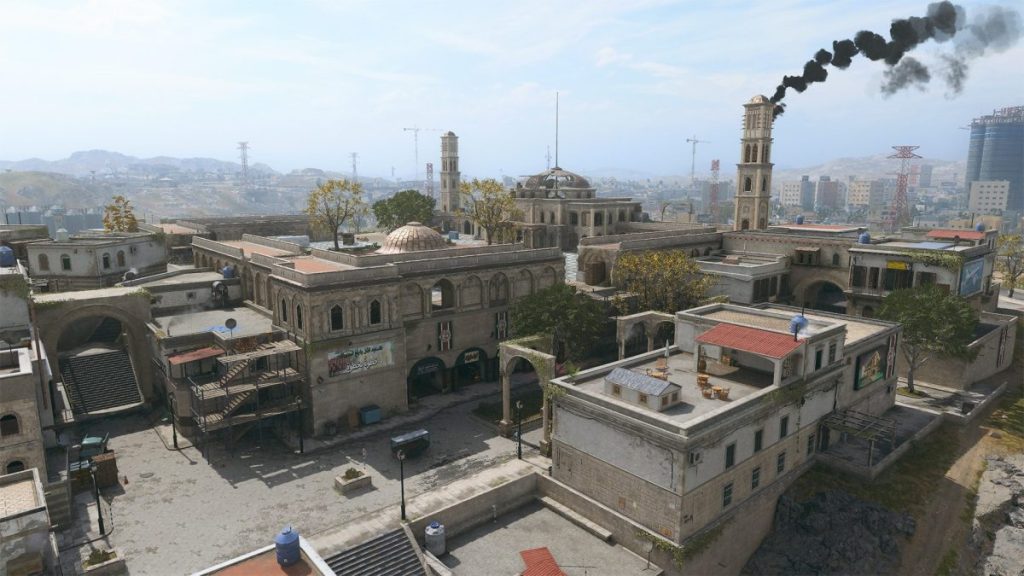
Old Town
Once the heart of Urzikstan, Old Town has decayed into ruin following the population growth further south. Crumbling stone buildings provide diverse combat spaces across multiple interconnected levels. Use the tight corridors and bombed-out structures for close-range gunfights. The partially collapsed walls and ceilings allow creative room-to-room flanking by climbing debris piles. And the central castle features stunning architecture and scenic views over the river below. Beware campers when crossing the exposed bridge though. Fight through history amid the worn streets where Urzikstan first emerged.
Seatown
Situated within Old Town along castle fortifications, Seatown features densely clustered shops, homes, and municipal buildings. The compact footprint and abundant blind corners create high tensions for room-clearing and close-quarter duels. Traverse sideways out windows and doors to surprise enemies anticipating hallway approaches. Or ascend staircases and ladders for vertical flanks through offices overlooking the local footpaths and merchant stalls below. Tall structures provide quality overwatch, like the prominent hotel scoping two bridge crossings. Though beware staying stationary too long before getting infiltrated from behind by cunning opponents.
Nahr Bathhouse
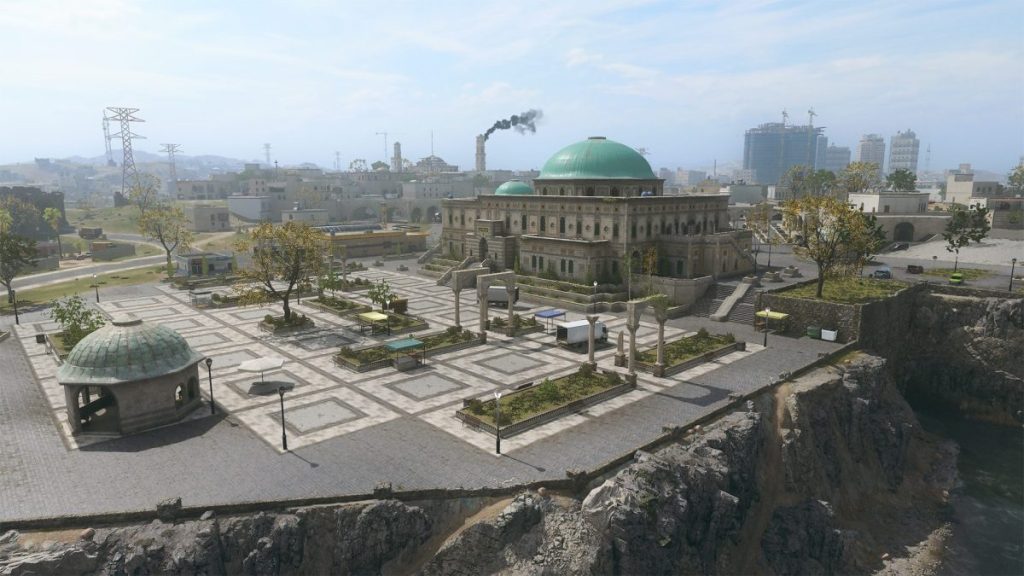
In Old Town’s northern edge lies the Nahr Bathhouse ruins with partially destroyed pools, waterways, and chambers with scenic views through cracked domes. The open design allows mid- to long-range firefights across the multi-level historic spa. Teams might camp catwalks circumferencing the grand hall, using the elevation and cover to eliminate threats entering below. Flank these positions by silently swimming lush waterways underneath stone archways, emerging elsewhere to attack vulnerable rear opponents. The aqueducts, pipes, and high exterior walls further enable stealthy maneuvering on surrounding forces.
Opal Palace
This royal castle located centrally in Old Town is currently under renovation, though still stands as a formidable stronghold. The high outer curtain walls provide solid protection when holding the main keep, allowing teams to build makeshift bunkers using debris and building equipment. Use the scaffolding and half-finished structures to flank outward onto enemy positions, then quickly reposition back into cover. The palace offers a balance of open courtyards and tight interior halls to leverage depending on your squad’s preferred engagement range. Expect action quickly though – multiple intersecting access points make infiltrations easy. Survive here initially before breaking out toward more remote loot locations.
Low Town
An impoverished shantytown built precariously over muddy tributaries on wooden stilts and concrete pillars. Don’t let the derelict setting fool you; Low Town’s central location makes it a hotbed for ambushes against teams transitioning across districts. Maneuver between the tightly packed shops and homes using exterior walkways and ladders when clearing the area. And watch for enemies shooting down from unexpected angles. The limited ground access favors defensive squad tactics – grab a bounty contract then bunker a small home, training sights on the few entrance routes. Be prepared for attacks from all sides.
Al-Sada Village
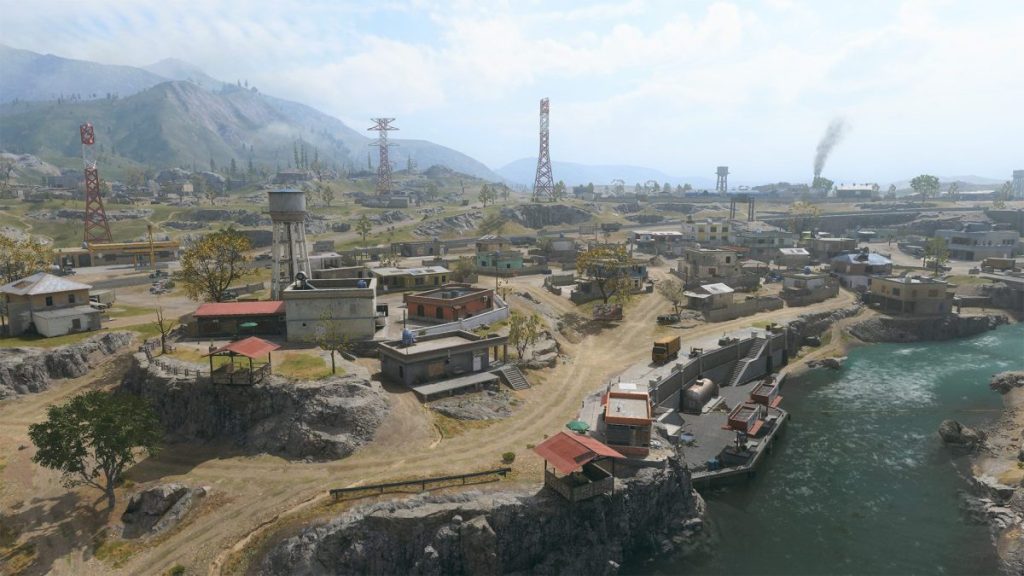
This village marks the eastward extent of urbanization before wilderness takes over. The dense buildings provide close spaces to battle block-to-block while looting gear and cash. Use the raised roads and stairways when flanking rival teams room-to-room. Seek the high ground water tower to survey terrain and identify targets for long-range shooters. Escape pursuers through the tangled back alleys. And utilize exterior footbridges when rotating to ambush sites above the main roadways into town.

About the author